Last updated on: January 6, 2025
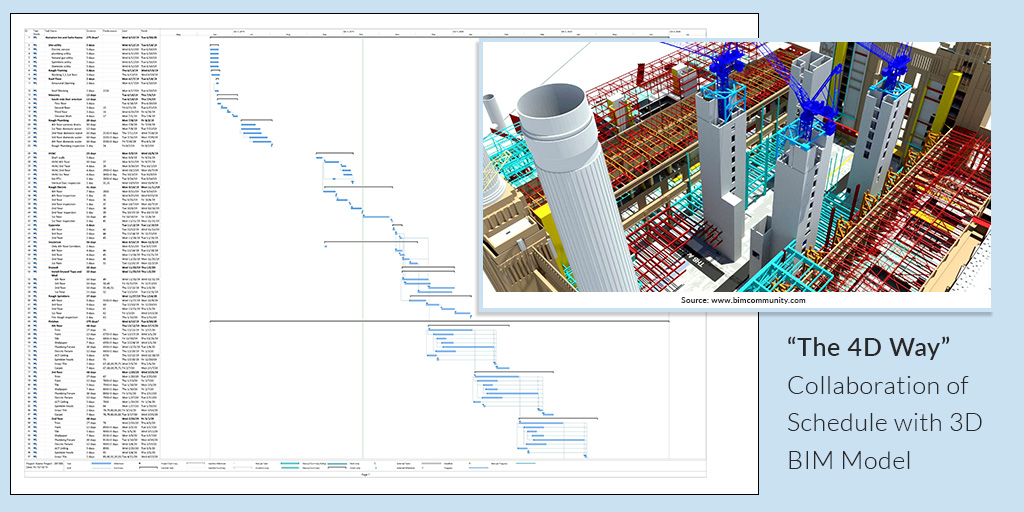
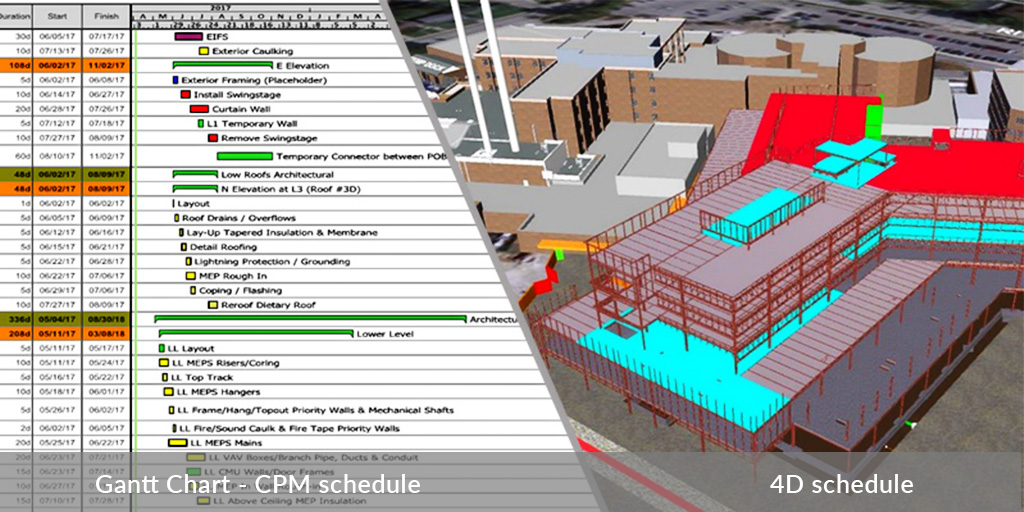
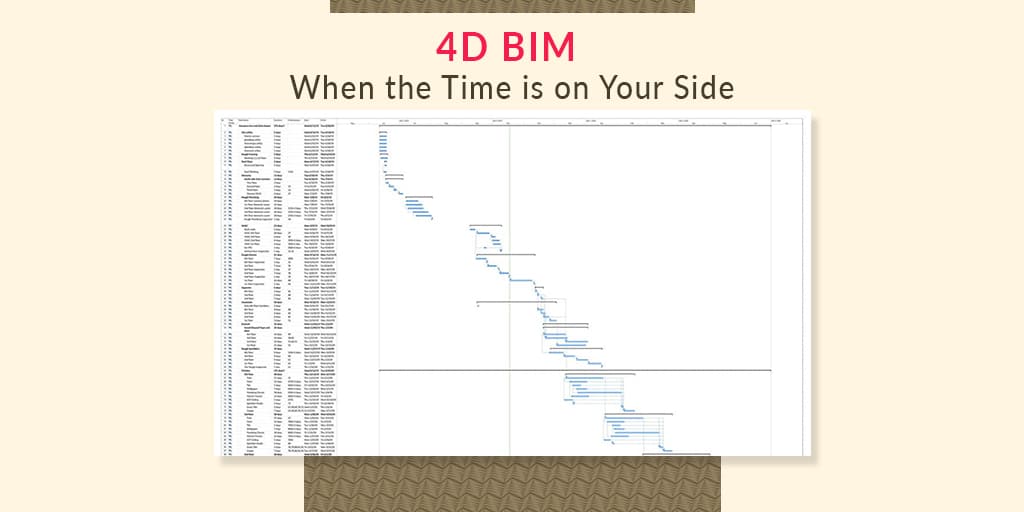
Earlier Gantt charts were popularly used to illustrate production 4D schedules. One of the major limitations with Gantt charts is that it extends to 20 pages long and can be overwhelming to read and visualize. With this format, project teams would only review their own activities and would dismiss the rest of the schedule. This can result in failure because it isn’t an effective way of communication.
4D Phasing is an extension of the 3D Model of the project. It adds the 4th dimensions to the 3D Model of the project, i.e., Time (Schedule). Any project that goes through construction or demolition compromises various sequences of events. 4D phases help the user understand and visualize the process of construction events.
4D models can be created according to the desired LOD (Level of Detail), from analysis during the initial design phase to interdisciplinary MEP Coordination during construction. One can update and maintain the 4D model throughout the project based on the schedule and 3D model. Critical Path Method Scheduling has been one of the best-known practices for the 4D construction schedule since the 1950s.
United-BIM provides 4D BIM models by integrating 3D BIM models with precise information of building construction activities, schedules, and 4D simulations for project teams. This video shows step-wise construction activities and precisely describes the 4D construction schedules and 4D simulation. This is a residential project where we have developed a 4th Dimensions BIM model by integrating the 3D BIM model with construction schedules and activities.
Objectives
When we see a virtual representation of the project and see it taking shape in a sequence of activities, it creates a much better understanding between all the project team members. It eliminates the difficulty of evaluation and communication of the activity’s interdependency. Traditionally, 2D models drawings were used to showcase phase which would require teams to visualize in their minds what all activities will occur at what particular time and space of the project. Well, this wasn’t a full-proof solution and teams might miss our many essential factors effective the project activities. The overall aim for a 4D model is to visually represent and communicate the plan of the project’s construction, its scope of work, responsibility, and activity of the project team, etc.
If a picture is worth a thousands words, then it might also be word a thousand line items on a construction schedule.
“The 4D (Four Dimension) Way”
Images improve our ability to comprehend the information and because of this, there’s a huge opportunity if we utilize BIM when we visualize the construction activities- “The 4D Way”
4D modeling enables Property Owners, Architects, Engineers, Contractors, and other planners to visualize construction-related activities and processes. Every activity involved in the construction must have a specific start and end dates linked to the 3D model components with specific locations to visualize the construction process (4D model). Sometimes these planners don’t explicitly state the start and end dates.
To think “the 4D way” it is important to analyze the business needs, project opportunities (defining the scope), and think about the implementation.

Don’t have the time to read the whole blog, no worries you can download it and read it at your convenient time.
Project Opportunities Analysis
4D modeling can be utilized in all types of construction or renovation projects. However, the challenges related to the project might vary from project to project. For example, in a construction project, the project teams can use the 4D Model to manage the construction schedule, avoid overlapping or interruptions between different teams and activities, matching the timeline with the location-based schedule, communicate the short-term objectives to the teams, and evaluate their daily progress, etc. Whereas, for a renovation/retrofit project, one of the major criteria would be how to utilize swing space, how to move tenants, for how long, during the construction within the building.
Explore Our Service Page: 4D BIM services | 4D Construction Simulation & Scheduling
4D Models in the Construction Lifecycle
A 4D model can be used in all the stages of the project lifecycle. The three main stages that can benefit from 4D models are:
1. Pre-design:
It is basically a stage where the feasibility of the project is evaluated. 4D models act as a very useful medium for strategic project planning where different phasing sequences, space configuration, and construction schedule optimization can be done. 4D models used for the renovation project would analyze different alternatives based upon whether to move the tenant out of the building.
2. Design Development:
4D models validate the constructability of the design and determine the advantages of different activities and sequences of the construction of the project building. They optimize construction schedule, phases in which construction will take place, and tenant sequencing. It also facilitates communication of the plan to the project teams and tenants.
3. GC Selection / Bidding
When contractors submit their proposal/bid, 4D models can be required to showcase the contractor’s ability to direct and execute the construction process. With complexity in the design, 4D models are used to gain a better understanding of the construction activities during the bidding stage. If the contractor has a better understanding of the space and the constraints, the bid will be more realistic and accurate.
Have any doubts? Let us know. Team United-BIM would be happy to assist you.
Drop us a mail, or Talk to us directly – (860) 317-7105
4. Construction
In the construction stage of the project, 4D models are used for better coordination between teams and constructability review. In other words, it gives you a fair understanding of the traffic on the construction site and site-flow processes. 4D models can also be used for weekly/fortnight construction progress review and tracking. This allows teams to compare the as-built with the as-planned project schedule for better management.
Factors Affecting 4D Implementation:
1. Project Teams
The 4D model includes both designing and scheduling parameters for which it is important to have all the members of the project team to be on board.
2. Budget/Schedule
Derivation of a 4D model is from a 3D model with time being the added feature. However, project teams should discuss what additional details and elements require to be modeled. Every project has a construction timeline, the task is to optimize the efforts of the teams by linking 4D model objects to the schedule of construction. There might be a difference between the 4D model schedule and the construction schedule, in those cases, additional activities should be added to the model to enable the correct visualization of the 4D phasing. All the project teams must ensure that the timing of the model creation is correct based on the complexity of the design, technology, and other challenges.
When 4D models get created too early or too late, then I might reap fewer benefits than those created during the ideal time. It is always recommended to have a 3D model early for the project but 4D models when created too early are generally superficial and might not be insightful. Similarly, when 4D models are created too late then they usually do not allow any changes to be made in the project.
3. Information Exchange
The Project Manager should be well-versed in the technology of the 4D model and its main issues:
- Software Integration Issue
- User Interface Issues
- 4D Technical Process Issues
Have any doubts? Let us know. Team United-BIM would be happy to assist you.
Drop us a mail, or Talk to us directly – (860) 317-7105
Step-wise Guidance on 4D Modeling
In order to get a better understanding of a 4D model, the process is bifurcated into steps with guidelines and additional tips on how to accomplish each step. There are different types of elements required for different types of 4D model which has been discussed below. Effective usage of the 4D model can only happen if the 3D model and schedule are in place in the 4D model. However, if these core components are not set up correctly, then it is very difficult to manage and update the model. It can reduce the effectiveness of the model. We have jotted down a few best practices for creating and managing the components effectively.
Step-1: Gather Initial Information
To initiate the process, it is important to set the foundation- gathering information to build the desired 4D model. Gathering of initial information can be done by acing two main activities- (1) Project Kickoff Meeting, and (2) Information Checklist.
- Project Kickoff Meeting– The aim behind the project kickoff meeting is to coordinate information exchange and to ensure that everyone involves has the same understanding of the use of the 4D model. This meeting will lay boundaries and clearly outline things like the intended use of the model, schedule for integration, coordination of information exchange, follow-up on roles and responsibilities.
- Information checklist– Whoever is modeling the 4D model, should ensure availability of the key information like 2D drawings, 3D model, Renderings, Construction Schedule and Phases, Critical Operations, and other major concerns during the construction process.
Step-2: Create Model
After gathering all the necessary information, modeling can begin. The modeler should thoroughly examine all the information gathered and develop a detailed plan to create the model. This step required manifold iterations between the 3D model, schedule, and 4D model. The initial high level of 4D models should be created first so that the model can be further developed based on the review of the project team.
Step-3: Review Model
The project team should periodically review and update the model. It is important for the 4d modeler to incorporate any insights or changes to the 3D model or schedule for the next revision of the model, as it would be responsible for managing and coordinating the 3D modeler and scheduler updates to the 4D model. The updates/changes should be done as often as necessary. The review should ensure the following:
- The modeling is on schedule
- The modeling can be used for the intended purpose
- LOD is correct in the model
- The model comprises all the necessary components of the schedule
- The model is easy to comprehend
Step-4: 3D modeling for 4D Phasing
3D models comprise a specific layering scheme within the modeling application. In the model, all the building elements (Slabs and interior walls on one layer) will be layered all at once, however, in the actual construction project building elements are never constructed at once. Therefore, it is important to have a 3D model layering scheme that supports 4D modeling activities.
If the 4D modeling application is within a suite of 3D modeling software, then it is easier as the software will automatically link the elements with the activities without changing the layering scheme. However, if any third-party software is used, then it is important to establish the layering scheme to support the accuracy of the function of the 4D model.
This can be implemented by following the below process:
- Specifying the layering standards in the 3D model.
- Additional building elements and activities which support visualization
- Orienting the model
- Including building elements
- Adding construction schedules
Step-5: Scheduling for 4D Phasing
The next step is to initiate the scheduling for the 4D phasing and this would be by describing the construction schedule at the phase level and describing the work areas:
- Generic Activity Categories:
This includes establishing general categories for each activity like “Construct”, “Temporary” or “Demolish”. These categories will facilitate visualizing the components during the activity date in the 4D model. Elements attached to the “Construct” activities will appear at the start and remain visible through the end of the schedule. Similarly, “Temporary” activities could be in two different line-items, such as erecting or removing shoring. Finally, elements attached to “Demolish” activities are visible from the start of the schedule and disappears at the end.
- Project-Specific Activity Types:
The schedule in the model should be bifurcated by different types of activities. For example, in a renovation project, the following activity types may appear: movement of tenants from the original location, construction activity, moving to swing space, tenants move off-site. These activities would appear in different colors.
There can be non-constructional activities that would require to be incorporated into the schedule for better visualization. For example, “Movement of tenants” is actually composed of two activities: (1) Highlighting where the tenants are moving from and (2) Highlighting where the tenants are moving to (swing space). These are two different activities and would require to be separate in the 4D model.
- Activity Attributes:
Attributes like cost, resources, and space can be loaded with the other information of the element to be visualized in the 4D model. These attributes would be as per the Level of Detail required by the client.
Step-6: Linking the 3D model and schedule
If the 3D model and the schedule are set up correctly, then linking these two together to create a 4D model would be an easy process. However, it depends on the complexity of the project and this can become very tedious and time-consuming. During this linking process, attention to detail is very crucial to ensure the links are correct.
- Different LOD: In some projects, LOD in 3D may vary from the LOD of the schedule. The 4D model will only be detailed as the minimum detail representation by the 3D model or schedule.
- Different Groups: The objects within the 4D model can be arranged in groups so that teams can focus on specific parts of the model. Grouping can be done either for components or activities that will be detailed separately. These groups should include: per tenant, per floor, site model, and permanent objects. These groups allow different teams to focus on their concern details. Another advantage is that these grouping or naming convention is- automated linking.
Find Out More Tips Here: What are BIM Dimensions – 3D, 4D, 5D, 6D, and 7D BIM Explained | Definition & Benefits
About the Author

Coordination Manager / VDC Manager at United BIM
With over 10 years of experience in the AEC industry, Akash Patel is a seasoned Coordination Manager and VDC Manager at United BIM. His expertise lies in managing complex MEP-FP coordination projects and leveraging cutting-edge BIM technology to ensure seamless collaboration and precision. Akash is dedicated to delivering high-quality, detailed models that meet the demands of modern construction. He is passionate about optimizing workflows and driving innovation within the BIM field.
